Creating Windows Installation Media on ChromeOS
Let's discover how to create a Windows Installation Media USB on a ChromeOS device such as a Chromebook.
What you'll need
- An 8GB or larger USB flash drive
- If you need one, we recommend and test with the following USB drive
- 15 GB of free space on your ChromeOS device
Creating the Installation Media
- If your USB flash drive is plugged into your ChromeOS device, unplug it.
- Download the Windows 11 Disk Image (ISO)
- Note: It is easy to download the wrong file from Microsoft's website.
Use the screenshot below to help you locate the correct download.(show screenshot)
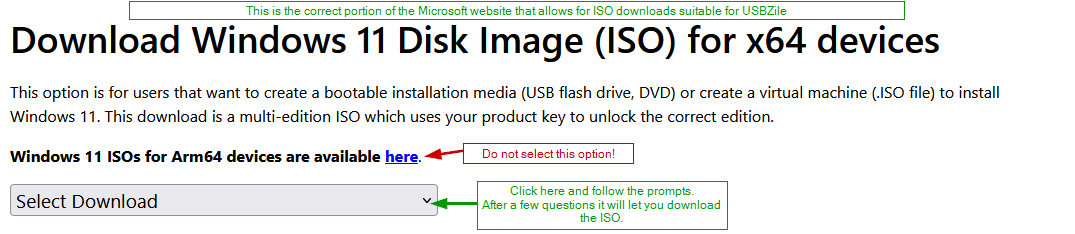
- Note: It is easy to download the wrong file from Microsoft's website.
- Input the Windows 11 Disk Image (ISO) you downloaded from step 2 into the USBZile ISO Converter Web Page.
- Note: This outputs a ZIP file we will use later on.
- Format your USB flash drive
Warning: This process will delete all data on the selected USB flash drive- Plug the USB flash drive into your ChromeOS device.
- Open the
Filesapp that comes preinstalled on all ChromeOS devices. - Right-click the USB flash drive and select
Format device. - Leave the
Drive nameblank and set the Format toFAT32 - Click
Erase and Format
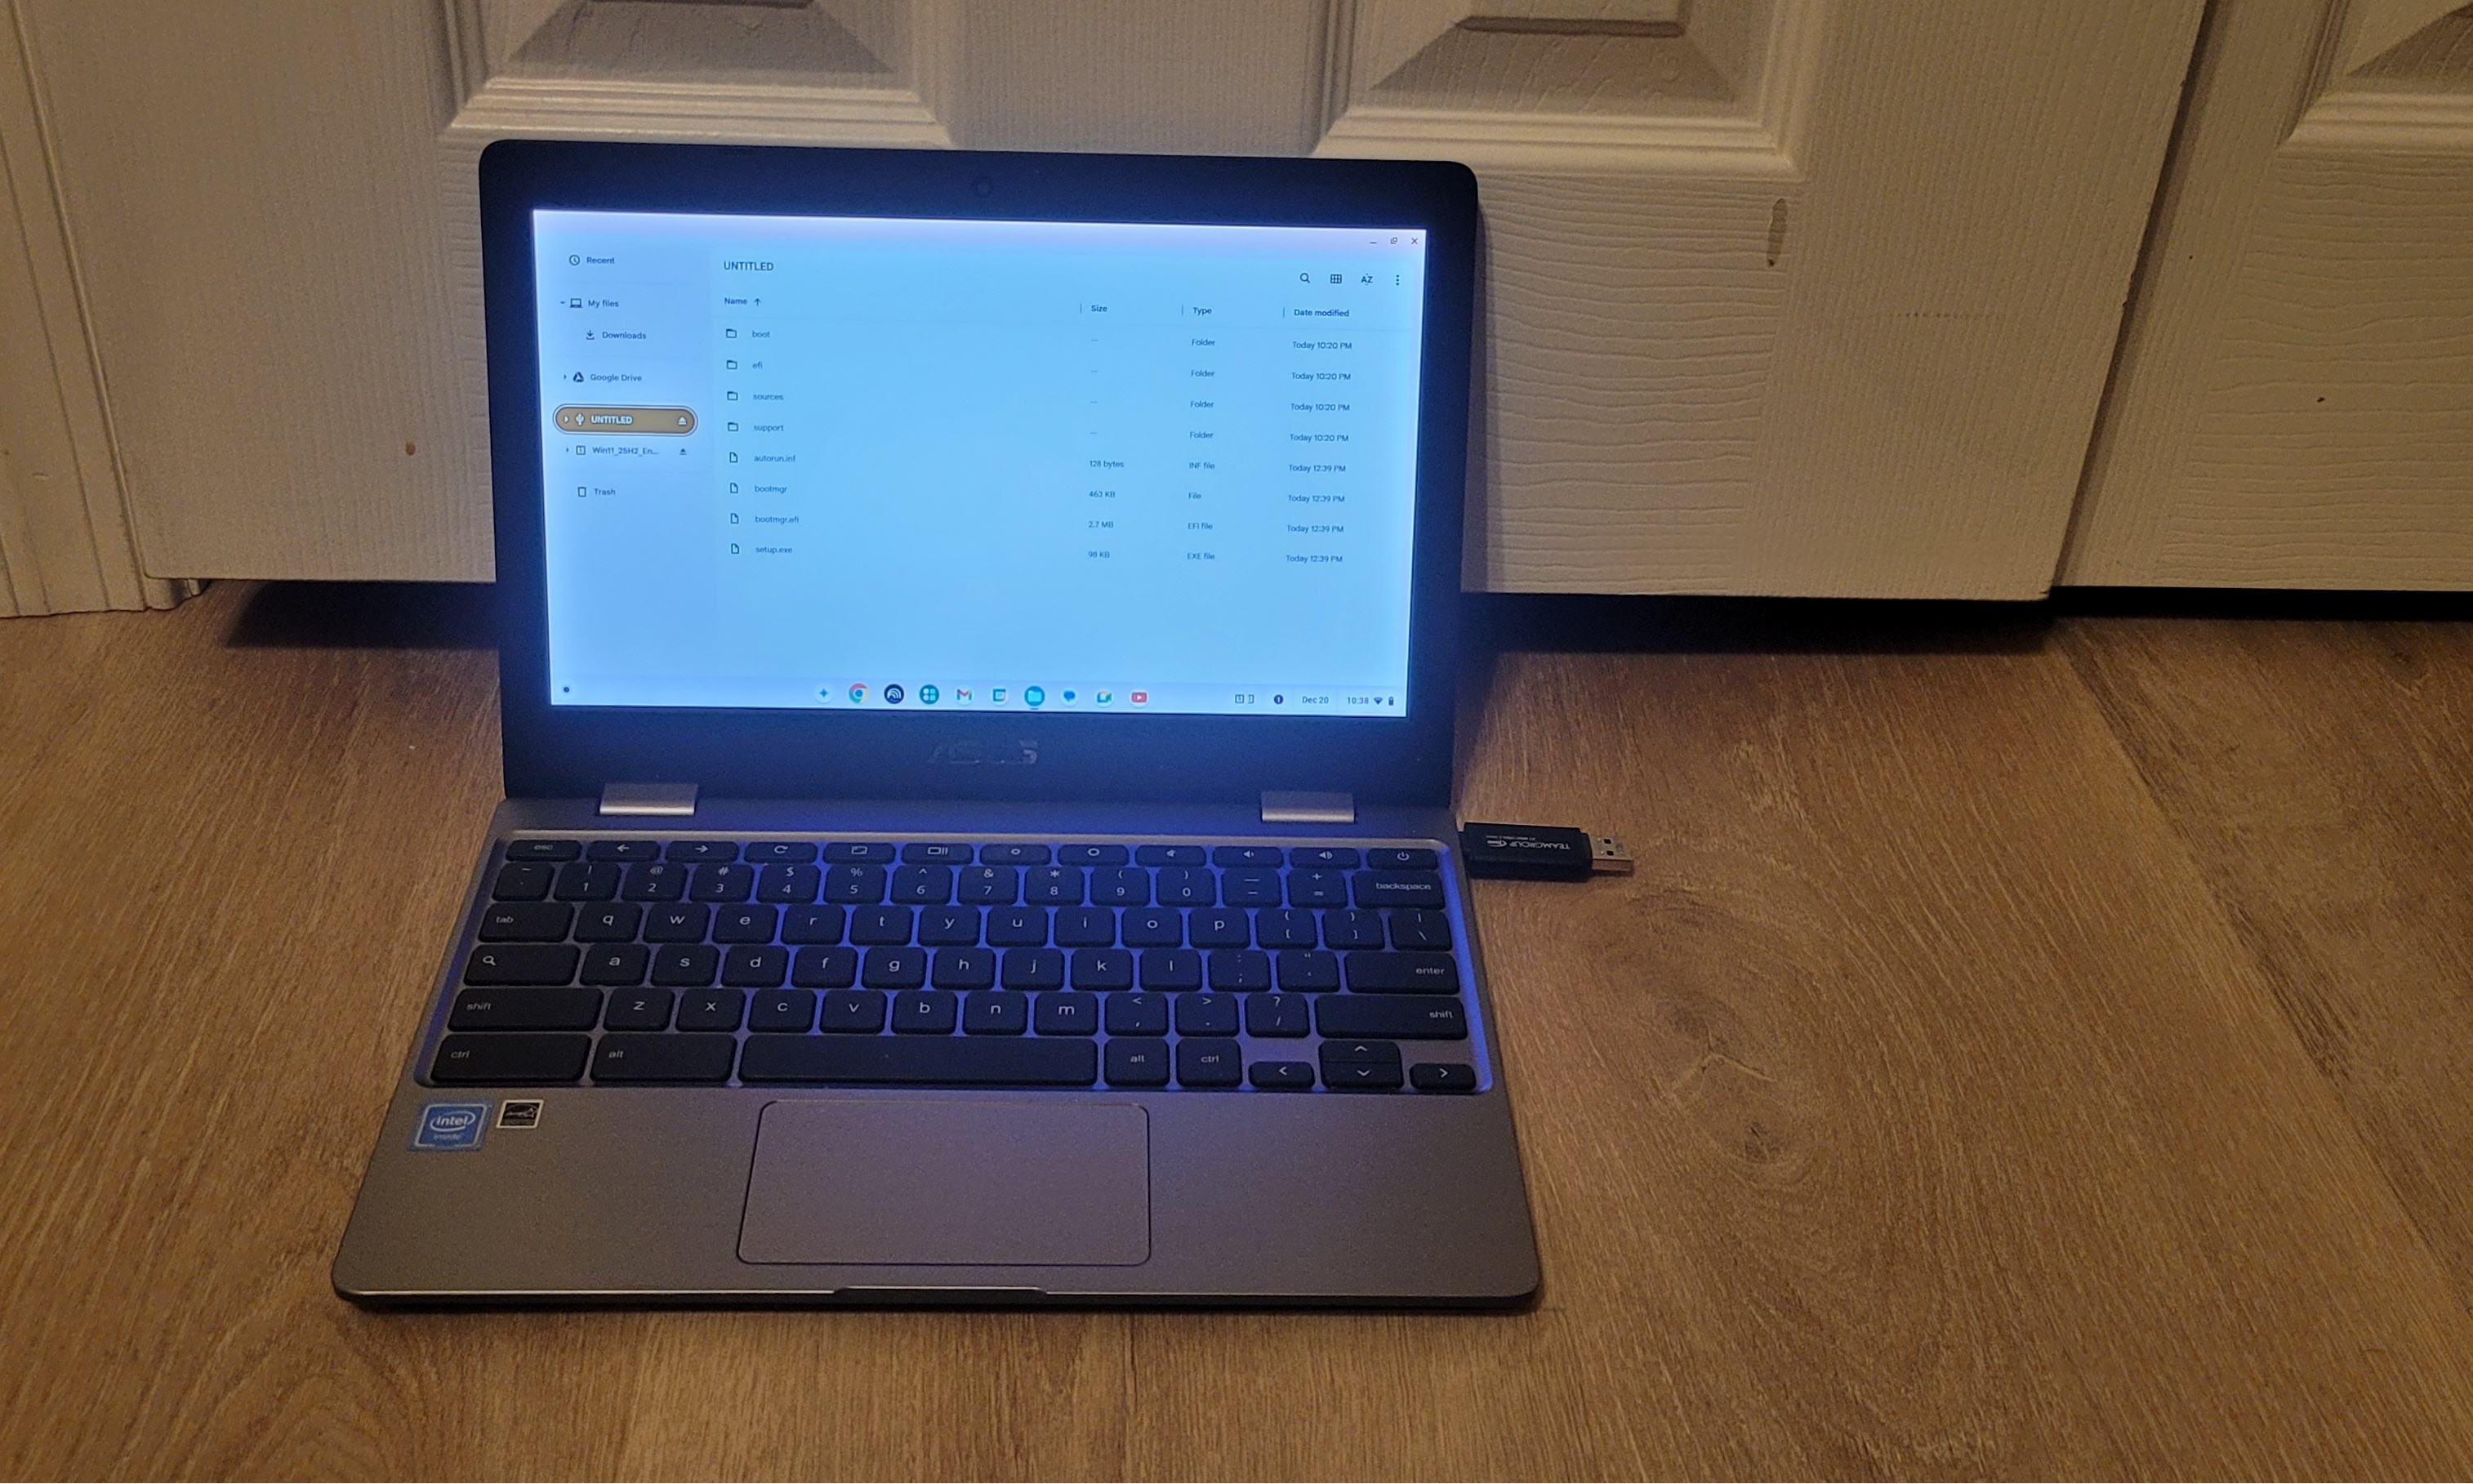
- Copy the ZIP file contents to the USB flash drive
- Open the
Filesapp that comes preinstalled on all ChromeOS devices. - Locate the ZIP file you created/saved earlier in step 3.
- Right-click the ZIP file and select
Open. - Select all files (ctrl + a) and then drag them to the USB flash drive from step 4.
- After all the files finish copying,
Ejectthe USB flash drive from your ChromeOS device.
- Open the
Congratulations, you now have a Windows Installation Media USB!